
How to make a size chart for your brand, from your samples
Measure one finished piece of every size at the same points, laid flat, and write the numbers in a table with the sizes across the top. Check that each size steps up evenly from the last, say whether the numbers are the garment's or the body's, and add how to measure and a fit note.
The fastest honest size chart is the one you measure yourself. Take one finished piece of each size, lay it flat, measure the same points on every one, and write the numbers in a table. Then check that they step up evenly, decide whether you publish the garment's numbers or the body each size fits, and add the two things shoppers need around the table: how to measure, and how the item fits.
Copying another brand's chart is quicker and rarely right. Their chart describes their patterns, not yours.
First, decide what the chart describes
A size chart holds one of two kinds of numbers, and shoppers need to know which.
- Garment measurements are what you measure on your samples: the half chest laid flat, the length, the sleeve. They are exact and easy to get. Shoppers compare them with a piece they already own.
- Body measurements are the bodies each size is made for: the chest, waist and hips of the person wearing it. Shoppers compare them with their own tape. You get them from the garment by taking off the room you designed in.
Many charts give both, in two tabs. Ruban Size's Women's tops, Men's T-shirts and Coats and jackets templates do exactly that. Whatever you choose, label it: a 53 cm half chest and a 53 cm chest are very different garments.
Step 1: choose the points to measure
Measure what decides the fit of each product, and nothing more:
| Product | Points of measure |
|---|---|
| Tops, shirts, T-shirts | Half chest (pit to pit), body length from the high point of the shoulder, sleeve, shoulder width |
| Dresses | Bust, waist, hips, length |
| Pants and jeans | Waist, hips, inseam, rise, thigh, leg opening |
| Skirts | Waist, hips, length |
| Leggings and knits | Waist and hips relaxed, inseam |
| Outerwear | Chest, back length, sleeve |
Three to five points per product is plenty. A chart with twelve rows is harder to read than it is useful.
Step 2: measure every size
- Use finished pieces, washed if the product will be washed, from production rather than prototypes when you can.
- Lay each piece flat on a hard surface, buttons and zips closed, smoothed but not stretched.
- Measure the same points the same way on every size: same start, same end, tape straight. How to measure a garment flat shows each point.
- Write down the half measurement for anything measured across (chest, waist, hips laid flat), and label it as such.
- Measure two pieces per size if you can. When they disagree, measure a third.
- Use one unit, centimeters to the half or inches to the quarter, and convert later.
Step 3: check the steps between sizes
Read each row across. The difference from one size to the next is your grading, and it should be steady or widen smoothly. Ruban Size's Men's T-shirts template, garment tab, is a clean example:
| Size | S | M | L | XL | XXL |
|---|---|---|---|---|---|
| Half chest, laid flat (cm) | 50 | 53 | 56 | 59 | 62 |
| Length (cm) | 70 | 72 | 74 | 76 | 78 |
The half chest steps 3 cm and the length 2 cm, every size. If your row reads 50, 53, 54, 59, something is off: a piece measured at the wrong point, a stretched knit, or a pattern graded wrongly. Measure that size again before you publish. How size grading works has the steps of other garments.
Step 4: turn garment numbers into body numbers, if you want
Body numbers are the garment minus its ease. For a woven top, Ruban Size's ease table gives a regular fit 11.6 cm at the chest. A 53 cm half chest is 106 cm around, so it fits a chest of about 94 cm for a regular fit (106 minus 11.6). Do it for every size and you have a body chart. Knits and stretch fabrics need much less ease, sometimes less than none; how much ease clothes need has the numbers by garment.
Or skip the arithmetic: publish the garment numbers, say so in the header, and let a size finder add the ease for each shopper.
Step 5: write the chart
- Sizes across the top or down the side, in the order of your variants.
- The unit in each header: "Chest (cm)", "Half chest, laid flat (cm)".
- Ranges for body measurements ("80-84"), single values for garment ones ("53").
- Size systems on their own rows: US, UK, EU numbers next to your letters, if you sell abroad.
- How to measure, one line per measurement, in the shopper's words.
- A fit note when the cut doesn't follow the chart: "Slim cut: if you are between sizes, take the next size up."
Step 6: test it on a person
Give the chart to someone who hasn't seen it, with a tape. Ask them to choose a size, then try it on. Do the same with a garment they own: does your chart put them in the size they'd expect? Then open it on a phone and read the largest size with one thumb.
Making it in Ruban Size
From your spreadsheet. Copy your cells from Excel, Numbers or Google Sheets and paste them into any cell of the size chart editor. Ranges (35-36), fractions (38 1/8), heights (5′9″) and decimals with commas (1,75) are read as numbers, so the chart converts to inches by itself.
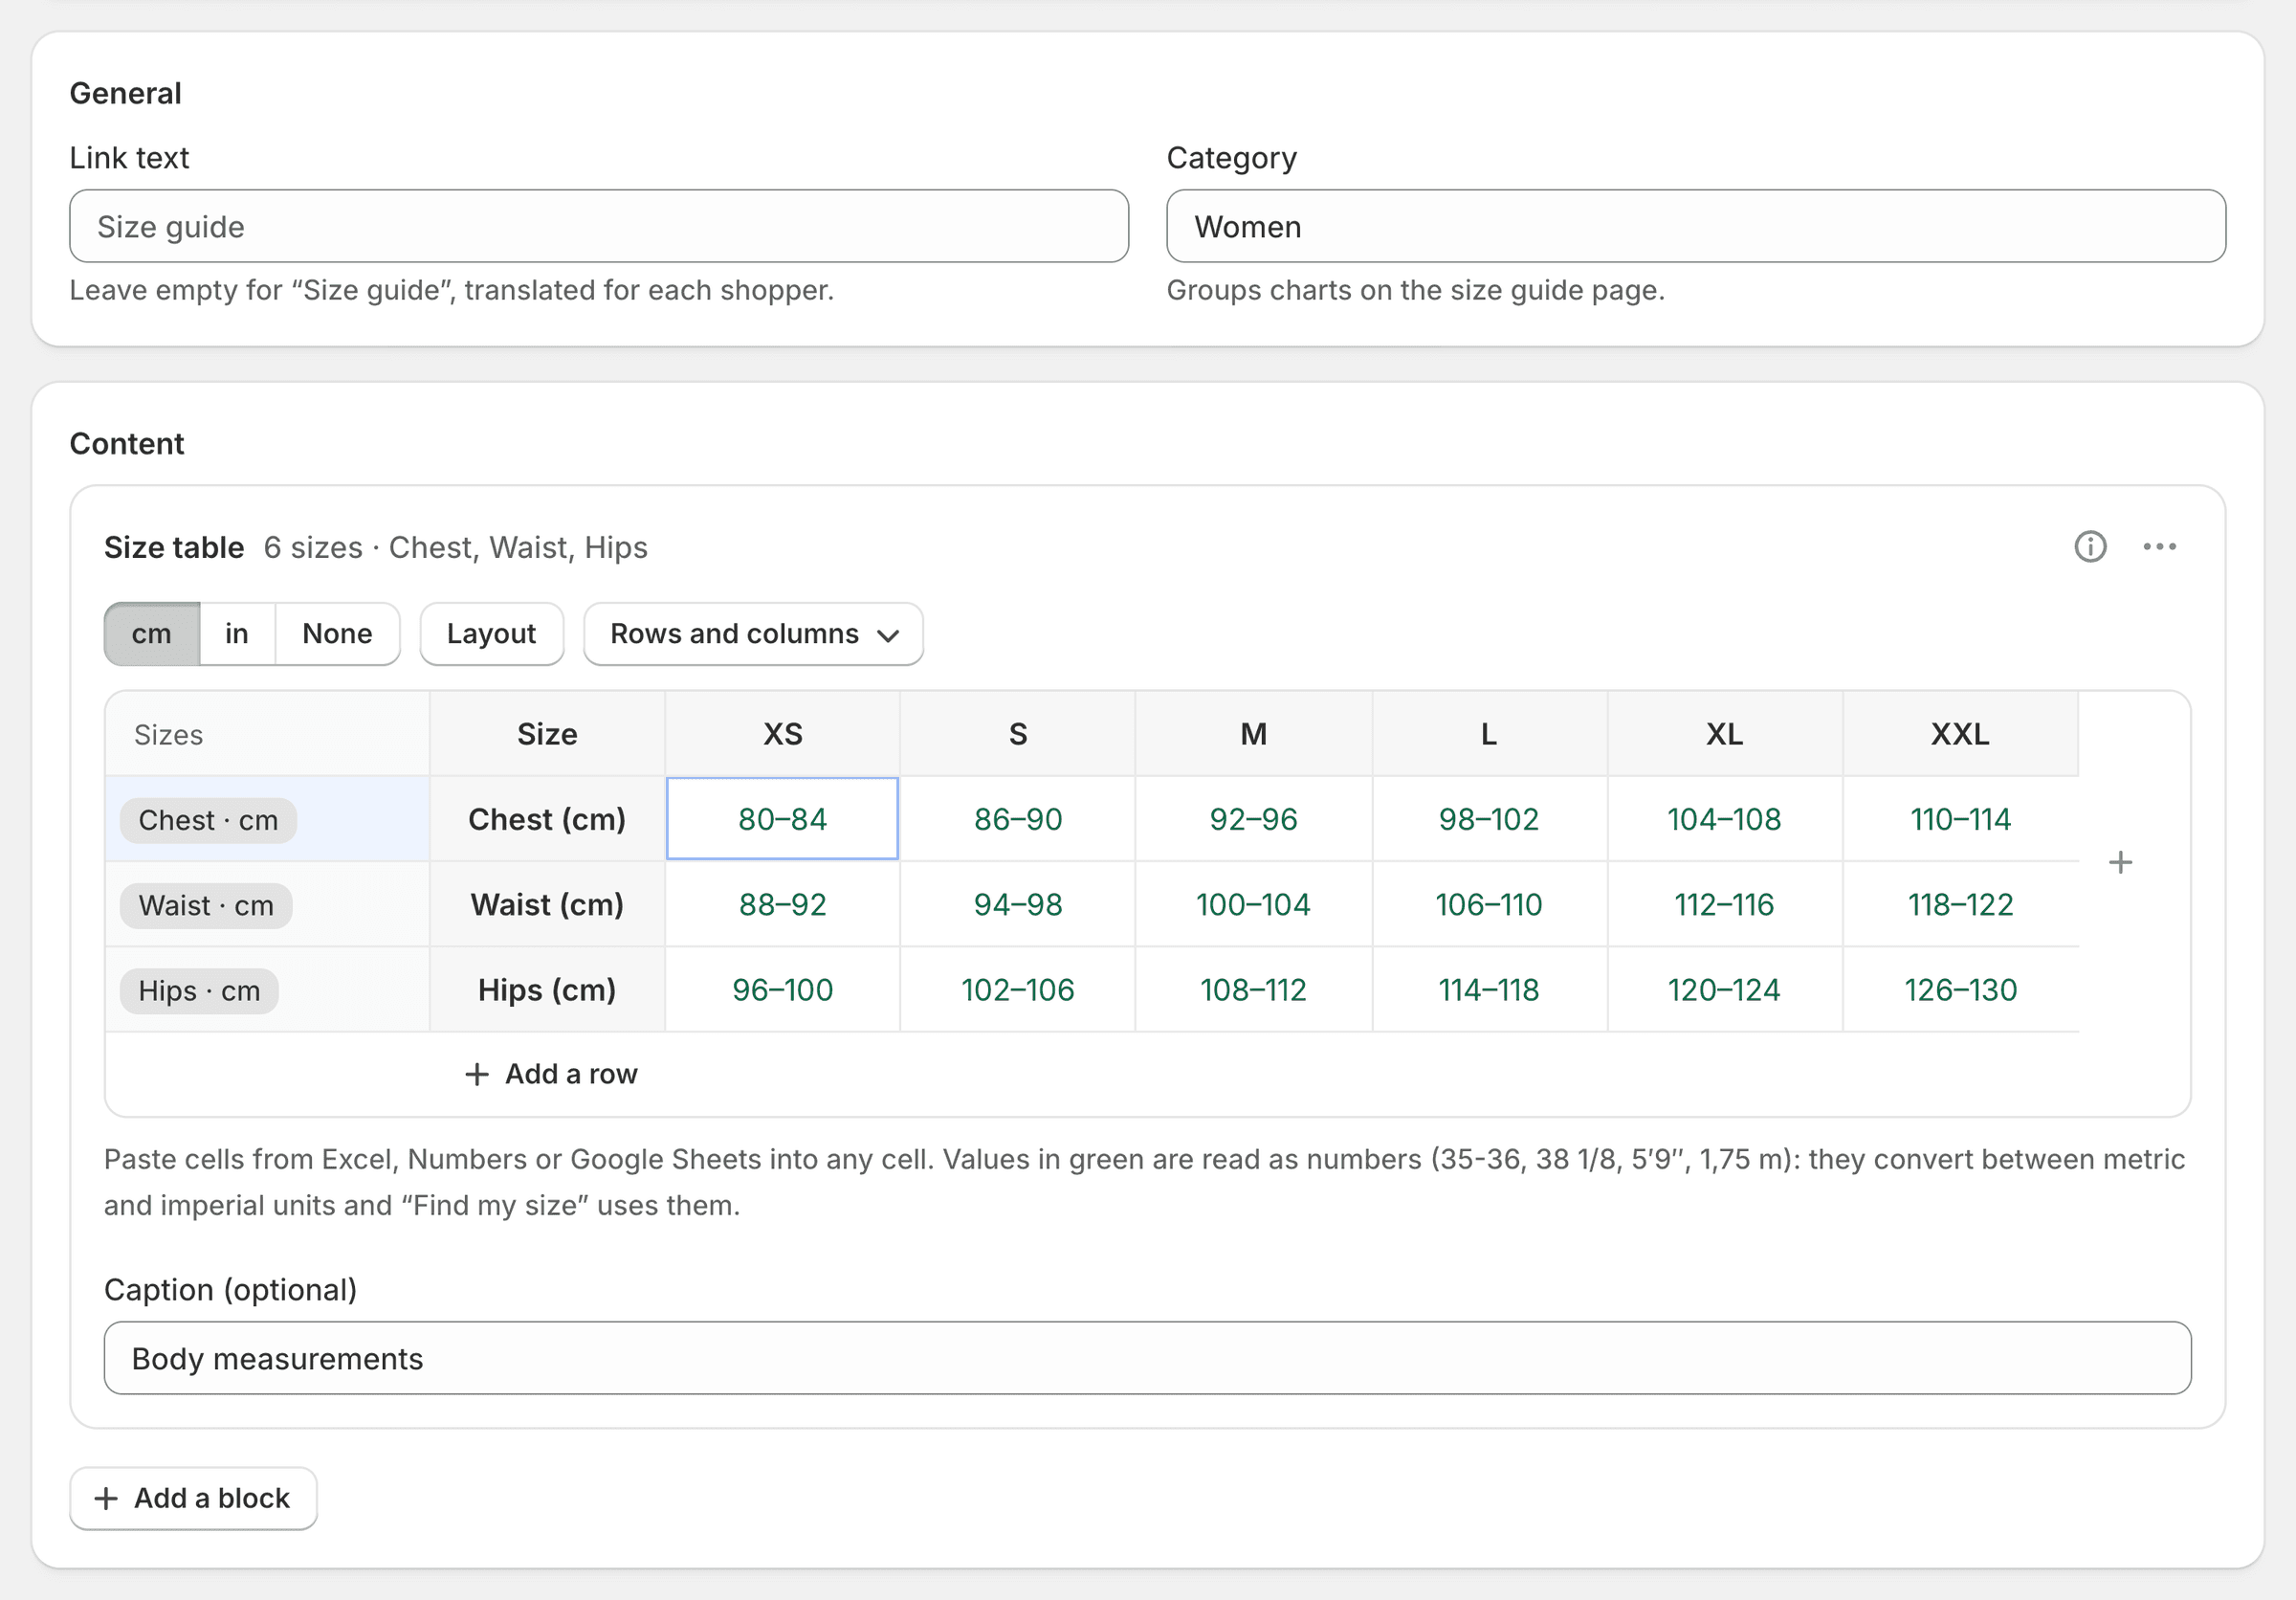
From a template. If a template measures what you measure, start there and replace the values: each one says "Typical values: adjust them to your brand's own measurements before publishing." The templates page lists all 39, in 11 categories.
From a chart you already have. On Pro and Fit, the AI import reads a photo, a PDF, a web page or a product description into a draft. Values it can't read are left empty and flagged, and nothing shows until you check and save. The import page has the details.
Garment or body, said once. A header like "laid flat" or "garment" tells Find my size it's a garment chart; it doubles laid flat values and adds the ease for the garment type. In the chart's Fit and Find my size tab you can change the garment type, set body or garment, turn on stretch fabric, set your own regular ease if your cut differs from the usual, and type measurements in Try it to see the size a shopper would get.
How to measure, shown. The how to measure block puts your steps beside a body or foot figure; the measurement a shopper points at lights up in the figure and in the table. The preview beside the editor shows the chart on a phone or a computer, and each save keeps the version it replaced.
Then choose the products in Where it shows, set the chart to Active and save. Find my size appears in the guide as soon as the chart has measurements.
Questions
How do I create a size chart for my clothing brand?
Measure one finished piece of each size at the same points, laid flat, and write the values in a table by size. Check the steps between sizes, label the numbers as garment or body measurements, and add how to measure and a fit note.
Should my size chart use body or garment measurements?
Garment measurements are what you can measure exactly on your samples; body measurements are easier for shoppers with a tape. Many brands publish both, in two tabs, with a clear label on each.
Can I copy another brand's size chart?
You can, but it describes their garments, not yours. Your M would carry their numbers on your cut, which is the mismatch a size chart is meant to prevent.
How many measurements should a size chart have?
Three to five per product: the ones that decide the fit. Chest, length and sleeve for a top; waist, hips and inseam for pants.
Keep reading
- How to measureHow to measure a garment flat for your size chartLay the garment flat and measure straight across from armpit to armpit, from the top of the shoulder to the hem, and along the sleeve. Then write "laid flat" in the header, so nobody takes half a chest for a whole one.6 min
- Sizing explainedHow much ease clothes need: the numbers by garmentEase is the garment measurement minus the body measurement. A fitted top needs about 8.9 cm (3.5 in) at the chest, a regular one 11.6 cm (4.6 in), a regular coat 18.9 cm (7.4 in). The full table by garment is below.7 min
- Sizing explainedHow size grading works: from one sample to a size rangeGrading turns one approved sample into a full range of sizes. Every point of the pattern moves by a set amount per size, the grade rule. Girths grow by several centimeters a size, lengths by one or two, and the steps often widen toward the larger sizes.6 min
- Shopify guidesHow to add a size chart to ShopifyShopify has no size chart tool of its own, so you add one with an image, a page, metafields or an app. An app gives you real tables, the right chart on each product and a cm/in switch; the other ways mostly get you an image.6 min